How to repair a plastic outer drum

A thin crack in a plastic washing machine drum can often be repaired using a soldering iron to melt and seal the plastic, followed by a layer of Debor flexible sealant as a second defence. Sealing tape is a third option for cracks on flat surfaces. Holes are much harder to repair successfully and may require a replacement drum.
It is sometimes possible to repair a cracked or holed plastic washing machine outer drum rather than replacing it. This guide covers three repair methods and explains how to identify and remove the cause of the damage before starting any repair.
Before Starting Any Repair – Find the Cause
Coins are a common cause of cracks and holes in plastic drums, but any metal object can cause damage. Before attempting any repair, the object that caused the damage must be found and removed – otherwise it will simply cause further damage.
A thin crack was most likely caused by the impact of a metal object. The object will still be inside the machine somewhere. A large hole may mean the object was punched right through – check the floor around the machine and inside the base of the appliance.
Carefully examine the inner drum for dents, which are evidence of an obstruction. Check inside the sump hose and pump filter. Tilt the machine gently from side to side and front to back – if something slides around, it is still inside.
For help retrieving a stuck object: how to remove something stuck in a washing machine drum.
Method 1 – Soldering Iron
A soldering iron is an effective tool for sealing thin cracks in plastic drums. The technique involves using the heat of the iron to melt the surrounding plastic and fuse it across the crack.
Get the iron fully hot before starting. Work slowly and gently along the crack, bringing plastic from each side of the crack over to melt into it. Be careful not to apply too much pressure – a hot soldering iron can go straight through thin plastic drum material very easily. If the iron cools before the crack is fully sealed, unplug it, allow it to reheat, and continue.
Ideally the crack should be sealed from both inside and outside the drum. In practice this is often not possible as many modern drums are welded together and cannot be stripped down. If the drum has already been stripped for inspection, sealing from the inside as well is worthwhile.
Method 2 – Washing Machine Sealant
After sealing a crack with a soldering iron, applying a layer of flexible sealant over the repair provides additional protection. Washing machine engineers use a specialist product called Debor sealant, which is both flexible and heat-resistant. Roughen the area around the repair with sandpaper, then apply a generous patch of sealant covering the sealed crack and the surrounding area.
Method 3 – Sealing Tape
Waterproof sealing tape is a third option for cracks on flat sections of the drum. Products such as Gorilla tape, which is marketed as weatherproof and waterproof, may be suitable for this application. Apply plenty of tape with generous overlaps to ensure a thorough seal. Check the repair periodically – if the tape starts to peel at the edges, the seal is at risk of failing.
Repairing a Hole in the Drum
Holes are significantly harder to repair than cracks. A large hole, or one in an awkward location, will most likely require a replacement outer drum or a new machine.
If the hole is small and accessible, and especially if the piece of plastic that was punched out is still available, a repair may be possible. If the piece fits back in place without pushing through into the drum, try bonding it with epoxy resin such as Araldite. Once bonded, seal the edges with a soldering iron and cover the entire repair with waterproof tape.

A failed repair during a wash cycle can result in a serious flood. If there is any doubt about the integrity of the repair, do not use the machine until it has been checked by a professional.
Can You Claim on Home Insurance?
If the damage was caused by a foreign object getting inside the machine, it may be covered under accidental damage cover on a home contents insurance policy. Check the policy terms – some policies specifically cover appliance damage caused by accidental means.
Need professional help?
Frequently Asked Questions
Can a cracked washing machine drum be repaired?
Often yes, if the crack is thin and the cause of the damage has been found and removed. A soldering iron can be used to melt and seal the plastic, followed by flexible sealant such as Debor as a second layer of protection. Waterproof sealing tape is a further option for cracks on flat sections. A successful repair depends on fully sealing the crack – any remaining leak path can result in flooding.
What causes cracks and holes in a washing machine drum?
Metal objects – most commonly coins – that get into the outer drum during a wash. The spinning action drives the object against the plastic wall at speed, causing cracks or punching a hole through it. The object causing the damage must be found and removed before any repair is attempted, otherwise it will cause further damage.
What if the damage is a hole rather than a crack?
Holes are harder to repair. A large hole or one in a difficult location will usually require a replacement outer drum or a new machine. A small, accessible hole may be repairable if the broken piece of plastic is available – it can be bonded back with epoxy resin, sealed with a soldering iron, and covered with waterproof tape. Any such repair must be watertight before the machine is used.
44 Comments
Grouped into 29 comment threads.
2 replies Nice one Jeremy. Good luck and keep us informed.
2 replies Hello again Andy, quick follow-up to my last. I've found a hose ... it's a miracle, a 'new' unused hose but obviously manufactured a long time ago, sitting way down the back of an appliance parts store! So now when I fit it, I know from the warning on that other site that I need to not only remove the rear gal. panel, but also remove the inner stainless steel perforated bowl assy so as to get access to where the hose is clipped on the *inside* of the plastic outer water-containment tub. As with all things for first-timers, it's not obvious. So my question is, do you know where I might try for a service manual for the machine, a Hoover Elite 920 top loader? Manual download sites have probably taken over from lyrics sites as being fraught with danger ... "here be dragons" ... so I'm always wary. Thank you again.
Hello again Andy, quick follow-up to my last. I’ve found a hose … it’s a miracle, a ‘new’ unused hose but obviously manufactured a long time ago, sitting way down the back of an appliance parts store! So now when I fit it, I know from the warning on that other site that I need to not only remove the rear gal. panel, but also remove the inner stainless steel perforated bowl assy so as to get access to where the hose is clipped on the *inside* of the plastic outer water-containment tub. As with all things for first-timers, it’s not obvious. So my question is, do you know where I might try for a service manual for the machine, a Hoover Elite 920 top loader? Manual download sites have probably taken over from lyrics sites as being fraught with danger … “here be dragons” … so I’m always wary. Thank you again.
Likely replying to Jeremy Bird
Hello Jeremy. If this machine is over 30 years old I would seriously look into replacing it rather than stripping it down. Almost all of the parts are obsolete and if you have to strip it down and disturb main seals I wouldn’t hold out much hope of them remaining water tight. Over 30 years is ridiculously long for a washing machine, it would be more remarkable if it lasted too much longer even if you managed to fix it. The only manuals available are user manuals.
Thanks Andy. Can’t disagree with anything you say. Or, without the double negative, I agree with all you say! With that said though …. call me sentimental, but I just can’t bring myself to dump this thing for want of a hose! If only that damn hose wasn’t such a nightmare to replace. But now that I’m this far, I have to see it through. At the moment I’m at the stage of being unable to get the inner (perforated stainless) drum out, so the job is again on hold while I ponder. If a miracle happens and I actually get this thing working again and it heads towards its next milestone of forty years’ continuous use, I’ll report back. Your input and advice have been really appreciated, thank you.
2 replies I don't think it is likely to be able to do a decent lasting repair to the bracket if it has broken off. There should be some plastic sleeve or rubber sleeve but it has most probably fallen off somewhere. Check inside the base of the machine. It is very unusual for a plastic bracket for fixing the motor on to break. Just in case I'm not totally understanding exactly what has happened feel free to send me a picture.
I don’t think it is likely to be able to do a decent lasting repair to the bracket if it has broken off. There should be some plastic sleeve or rubber sleeve but it has most probably fallen off somewhere. Check inside the base of the machine. It is very unusual for a plastic bracket for fixing the motor on to break. Just in case I’m not totally understanding exactly what has happened feel free to send me a picture.
Likely replying to Andy Trigg (Whitegoodshelp)
Hi Andy,
Thanks for the prompt response – I suspect you may be right about a decent lasting repair but I will send the photos. I did wonder if I could wire something back into place but it would be a bit of a bodge!.
I may be missing something, but I cannot see how to attach a photo to my comments. Please advise me how to do that.
BTW it is actually a WMT01, but I don’t suppose that changes anything!
Richard
1 reply We have had a lamona washing machine since February,noticed water leakage.called the engineer out. He sent his report stating a foreign object has punctured the drum and is unrepairable. The retailer as said it is not their responsibility albeit they did not mention it was a plastic drum when we were sold it. Do I have a case or a lost cause.
We have had a lamona washing machine since February,noticed water leakage.called the engineer out. He sent his report stating a foreign object has punctured the drum and is unrepairable. The retailer as said it is not their responsibility albeit they did not mention it was a plastic drum when we were sold it. Do I have a case or a lost cause.
Likely replying to Andrea Dunn
Hello Andrea. I would think not. Do you have accidental damage cover on your house insurance by any chance? That may cover it.
They wouldn’t need to mention anything about how it’s made, and at the end of the day something left in pockets that damages the washing machine is always a customer’s fault – it’s an age old problem. When outer drums were made of metal it was much rarer for damage to occur though it still did in extreme cases. You could easily write off a brand new washing machine on the first day of use so always check pockets of everything before putting them in the washing machine. It should be the responsibility of everyone in the house to not leave anything inside pockets but ultimately the person putting them in the drum needs to double check. It’s very annoying.
1 reply To be honest Adrian, at 12 years old I wouldn't think it was worth having such a major job done. It looks like quite a few parts are already obsolete for this machine. And I can only find the tub front as a spare part but not the tub rear so it may be impossible to get it repaired anyway.
To be honest Adrian, at 12 years old I wouldn’t think it was worth having such a major job done. It looks like quite a few parts are already obsolete for this machine. And I can only find the tub front as a spare part but not the tub rear so it may be impossible to get it repaired anyway.
1 reply Sorry for a late reply Jamie. If the old drum is leaking between the 2 drum halves only a strip down and replacement seal will fix it properly. Yes, Bosch are now almost a budget brand with many of their appliances. Totally different from the Bosch of old. Only Miele have really stuck to their original high build quality ethos but even their appliances are less well-made than they used to be overall.
Sorry for a late reply Jamie. If the old drum is leaking between the 2 drum halves only a strip down and replacement seal will fix it properly.
Yes, Bosch are now almost a budget brand with many of their appliances. Totally different from the Bosch of old. Only Miele have really stuck to their original high build quality ethos but even their appliances are less well-made than they used to be overall.
Thank you for your reply Andy.
I dropped the Siemens off at our local recycling centre yesterday and mentioned it was fully functioning bar the slight leak; I was told that unfortunately they’re not allowed to pass anything on to someone who could fix it; there’s cameras everywhere and they have to drop it in the skip for white goods recycling, which is a real shame because I know in the old days a lot of stuff got found/passed along at local tips to be fixed up and reused. Hopefully they’ll at least recycle all the materials in the machine though.
We have a brand new Miele WKF311 arriving today. I got a great deal from Co-op Electrical and Miele said we’re OK to register for the 5 year warranty they’re currently offering too.
All the best,
Jamie.
1 reply Hello Tim. My advice is only about sealing hairline cracks. I'm presuming you mean it is leaking from where the 2 halves of the outer tub are joined together? This is quite unusual, if you are witnessing the leak dripping from the bottom of the outer tub make sure water isn't running from somewhere higher up as water can drip from places in a deceptive manner. If water is leaking from a seal joining the 2 halves together it would need a replacement seal. That is if one is available as many outer tubs in washing machines now are designed not to be repaired and some cannot even be taken apart because the 2 halves are actually welded together.
Hello Tim. My advice is only about sealing hairline cracks. I’m presuming you mean it is leaking from where the 2 halves of the outer tub are joined together? This is quite unusual, if you are witnessing the leak dripping from the bottom of the outer tub make sure water isn’t running from somewhere higher up as water can drip from places in a deceptive manner.
If water is leaking from a seal joining the 2 halves together it would need a replacement seal. That is if one is available as many outer tubs in washing machines now are designed not to be repaired and some cannot even be taken apart because the 2 halves are actually welded together.
Likely replying to Andy Trigg (Whitegoodshelp)
Hi Andy,
We have a Siemens WM16S493GB/01 washing machine. It’s 9 years old. Usual family of four use (around 4-6 loads each weekend).
I’ve had to repair it on a number of occasions, but mainly the same fault; I ended up replacing an entire run of 240V mains cable to the motor, must have been a bad batch of cable because it just kept splitting and then arcing. Since then it’s been fine, but it triggered an F23 error the other week, which indicates water in the sump.
On investigation, it’s leaking from the seal between the two halves of the plastic outer tub just like Tim described in the last comment here for his LG washing machine. It was leaking from an area around one of the bolts on one side and definitely not running down from anywhere else.
I’ve tried sealing with Debor all along that edge, but it’s not easy as the clips get in the way obscuring the join and the leak just moved to the other side and now only under spin (before even just standing water in the drum would seep). The amount of water is negligible, so for now a plastic bowl taped to the base allowed the machine to run, but it’s obviously not a long term solution and I don’t like that it’s close to the motor.
I also noticed one of the concrete blocks on the front of the drum has split half way. It’s still holding together with the bolts and the sealant they permanently glued these to the outer tub with.
The seal kit is around £25, but the job to fit this is immense as you know, and probably requires some specialist tools I don’t have. Not proud of this, but it’s a tight space and I know one of the bolt heads shredded when I went round checking they were tight (there was a little movement, presumably just the years of use), so that one won’t loosen off again now.
So I’m in a quandary because the rest of the machine is still functioning perfectly, which makes me loath to throw it out, but I also know I could destroy it if I try and replace the outer tub seal. Also, if I was doing that, I’d probably replace the door seal too (it’s exhibiting the usual mouldy nature of one this old) and then it’s starting to get more expensive; which makes me wonder how the bearings are, and what else might drop dead soon after even if I managed to fix the leak.
I worked out it’s cost us around £1.60 per week over it’s lifetime, which is probably a good way of looking at it, but the environmental side of me is agitated that it can’t fairly easily or cost effectively be repaired.
With the Siemens brand and the original purchase price I thought I’d bought a quality product, but it hasn’t felt like that over the years and it hasn’t lasted as long as the old Bosch machine it replaced. In fact, it’s the newest machine in the kitchen; I have a Bosch dishwasher and tumble dryer, both of which have never really had a problem in over 16 years (had to replace the heating element in the dryer the other year, but other than that, nothing).
Your site has been very helpful in my research for future options and I’m definitely going to head down the Miele road having looked up a video of their factory online and eyed up the superior build quality evident in their drums, suspension, counterweights, and everything really, and the fact they look a lot more serviceable. Sad that they’re the only ones doing this though.
Anyway, I just wondered if you had any thoughts/input on my situation.
Thank you in advance for your time and also for the valuable information on your website.
Best wishes,
Jamie.
1 reply Hello i have a swan sw2010w washing machine that the front counterbalance has sheered off all bolts and plastic sleeves thus the concrete counterbalance has dropped and there is now no way of reattaching it other than inserting bolts from inside the outer plastic drum casing and then attaching nuts to these bolts on the outer of the counterbalance or unless epoxy resin may give a strong enough of a bond to retain the concrete conterbalance in place. Any help would be appreciated Thank you Dave
Hello i have a swan sw2010w washing machine that the front counterbalance has sheered off all bolts and plastic sleeves thus the concrete counterbalance has dropped and there is now no way of reattaching it other than inserting bolts from inside the outer plastic drum casing and then attaching nuts to these bolts on the outer of the counterbalance or unless epoxy resin may give a strong enough of a bond to retain the concrete conterbalance in place. Any help would be appreciated Thank you Dave
Likely replying to David Slater
Hello David. I would say it is likely to be impossible to fix a drum where the bolts have sheared off. The concrete weight is very heavy and is shaken around very violently during spin so I can’t imagine any resin being strong enough to deal with that. The only cure is a complete new outer drum I’m afraid. The machine is scrap.
1 reply I would say you can't repair large gashes or holes. The advice in my article is only about sealing cracks. The only thing I would attempt to use in such circumstances is something called Milliput, which is like two large sticks of different coloured plasticine (or putty). When mixed together they set rock hard and will even set under water. I used to use it all the time but large holes may be difficult. You'd need to rough up the surrounding area and make a patch much bigger than the holes. As long as it sticks properly to the drum and never comes loose it is a great product.
I would say you can’t repair large gashes or holes. The advice in my article is only about sealing cracks. The only thing I would attempt to use in such circumstances is something called Milliput, which is like two large sticks of different coloured plasticine (or putty). When mixed together they set rock hard and will even set under water. I used to use it all the time but large holes may be difficult. You’d need to rough up the surrounding area and make a patch much bigger than the holes. As long as it sticks properly to the drum and never comes loose it is a great product.
1 reply Hi I discovered a similar problem with a damaged outer drum on a Bosch Maxx Classic WAE22260AU. The outer drum has circular damage (sort of crescent shaped), which ultimately wore through to leak in two areas, symmetrically bottom/right and top/left. The hole is now 5mm by 30mm in its largest spot. This looks like it wore through from the inside. It is not at a The two circular damages traces stretch over about 25% of the circumference of the outer drum, starting small and getting wider and deeper towards their ends where the holes are. One thing I also noted, the drum is not centered perfectly with the outer drum. However, when I rotate the inner drum, I cannot see any contact or chafing between the two, even when I push the plastic of the outer drum inwards with my thumbs. I checked for worn bearing (pushing and pulling the inner drum) but seems ok. I have the imression this developed over years of use. Along the traces I found dried-up washing powder, possibly mixed up with plastic filings. Anyone have a clue how this could have happened, or seen this before on a Bosch like this one? Photos available. Many thanks
Hi I discovered a similar problem with a damaged outer drum on a Bosch Maxx Classic WAE22260AU.
The outer drum has circular damage (sort of crescent shaped), which ultimately wore through to leak in two areas, symmetrically bottom/right and top/left. The hole is now 5mm by 30mm in its largest spot.
This looks like it wore through from the inside. It is not at a
The two circular damages traces stretch over about 25% of the circumference of the outer drum, starting small and getting wider and deeper towards their ends where the holes are.
One thing I also noted, the drum is not centered perfectly with the outer drum. However, when I rotate the inner drum, I cannot see any contact or chafing between the two, even when I push the plastic of the outer drum inwards with my thumbs.
I checked for worn bearing (pushing and pulling the inner drum) but seems ok.
I have the imression this developed over years of use. Along the traces I found dried-up washing powder, possibly mixed up with plastic filings.
Anyone have a clue how this could have happened, or seen this before on a Bosch like this one?
Photos available.
Many thanks
Likely replying to William Robert
Hello William, you can always send me photos by using my contact form to get in touch and replying to my email back to you. The only thing I’ve ever known damage an outer tub is a coin or other metal object left in pockets. Sometimes the coin can punch right through and disappear. Usually there will be some indentation on the inner drum as evidence but if a coin was pushed through the outer tub by a part of the drum underneath one of the 3 lifter bars it may not leave any evidence visible from our side of the drum.
Leave a comment
1 reply I'm trying to replace the inner drum dearing on a whirlpool 6th sense. The tub was sealed with a compound that was as hard as plastic! Can I get a compound to this standard at a wholesalers?
I’m trying to replace the inner drum dearing on a whirlpool 6th sense. The tub was sealed with a compound that was as hard as plastic! Can I get a compound to this standard at a wholesalers?
1 reply Hi It's about a plastic outer drum on a Bosch 1200 Washing machine came home to find out the kitchen was flooded from washer I investigated the prob only to find that the whole circumference of the plastic case have had been ripped away from the rest of the case would love to know why this happens machine eight yrs old gets used once a week wish I could send a pic Cheers John
Hi
It’s about a plastic outer drum on a Bosch 1200 Washing machine came home to find out the kitchen was flooded from washer I investigated the prob only to find that the whole circumference of the plastic case have had been ripped away from the rest of the case would love to know why this happens machine eight yrs old gets used once a week wish I could send a pic
Cheers John
0 replies As far as I know only Miele definitely still fit metal outer drums. Unfortunately it's not something a sales person is likely to know either. Update: many Miele washing machines now have plastic outer drums.
As far as I know only Miele definitely still fit metal outer drums. Unfortunately it’s not something a sales person is likely to know either.
Update: many Miele washing machines now have plastic outer drums.
0 replies Another problem with plastic outer drums is that bacteria attaches to them and eventually forms a film that smells and cannot be removed with running such as vinegar, soda crystals, professional cleaners, etc... we tried them all. I am getting quotes on wether the drum could be replaced but so far no luck. Anyone knows a reliable mechanic who could attempt this work on a Zanussi ZWV 1651S ? ..12 year old but in perfect condition except the smell.
Another problem with plastic outer drums is that bacteria attaches to them and eventually forms a film that smells and cannot be removed with running such as vinegar, soda crystals, professional cleaners, etc… we tried them all. I am getting quotes on wether the drum could be replaced but so far no luck. Anyone knows a reliable mechanic who could attempt this work on a Zanussi ZWV 1651S ? ..12 year old but in perfect condition except the smell.
0 replies Thanks for the update Jamie. I hope you find the Miele an excellent replacement.
Thanks for the update Jamie. I hope you find the Miele an excellent replacement.
0 replies Hi, I have an lg front loader washer. It appears to be leaking from the outer drum where the screws hold it together. I would think that it is just a leak in the seal due to pressure on the plastic (maybe from the screw). Just hoping I could jb weld it or even use the soldering iron to seal it up.
Hi, I have an lg front loader washer. It appears to be leaking from the outer drum where the screws hold it together. I would think that it is just a leak in the seal due to pressure on the plastic (maybe from the screw). Just hoping I could jb weld it or even use the soldering iron to seal it up.
0 replies Thanks for your reply Andy. I agree with you completely ... this is a weird, large-diameter hose, that connects from half-way up the plastic drum to a white nylon rectangular port, maybe 6" x 2", which is fitted into a similar-sized slot in the galvanised back panel. When I first saw it I thought "What is that, some sort of overflow hose? But how can this be an overflow hose ... it discharges straight out the back of the machine onto the floor, with no opportunity to attach a hose to it to run to a sink or drain?". But I couldn't think what else it would be. Your suggestion of it being a vent makes more sense given the design of the thing, but why would you need to vent from halfway up the plastic tub at a point which for all but the minimum fill level would be under water? And I agree with all you say about trying to seal the hole left by the hose if I simply remove it. Water is sneaky, inventive and incredibly determined to always find a way to head downwards at all costs! I think any patch I might apply wouldn't last very long. I have thought about fixing a patch with glue/sealant like the one you suggested, and then wrapping some sort of strong fabric belt very tightly around the drum over the patch, and gluing that in a few places around its circumference to stop it sliding up or down. This is getting complicated. BTW, this is the hose that's failed: 59-hoover-hose-overflow-501-onwards I'm having trouble getting one, and I'm especially having trouble getting the ring that fixes the hose on the inside of the plastic drum. As you can see, they do refer to it as an overflow hose. Any further thoughts now you know what it looks like? Thanks so much again for you input ... I have no idea how you have the time to respond to the many posts on your site. It's impressive. Cheers,
Thanks for your reply Andy. I agree with you completely … this is a weird, large-diameter hose, that connects from half-way up the plastic drum to a white nylon rectangular port, maybe 6″ x 2″, which is fitted into a similar-sized slot in the galvanised back panel. When I first saw it I thought “What is that, some sort of overflow hose? But how can this be an overflow hose … it discharges straight out the back of the machine onto the floor, with no opportunity to attach a hose to it to run to a sink or drain?”. But I couldn’t think what else it would be. Your suggestion of it being a vent makes more sense given the design of the thing, but why would you need to vent from halfway up the plastic tub at a point which for all but the minimum fill level would be under water? And I agree with all you say about trying to seal the hole left by the hose if I simply remove it. Water is sneaky, inventive and incredibly determined to always find a way to head downwards at all costs! I think any patch I might apply wouldn’t last very long. I have thought about fixing a patch with glue/sealant like the one you suggested, and then wrapping some sort of strong fabric belt very tightly around the drum over the patch, and gluing that in a few places around its circumference to stop it sliding up or down. This is getting complicated. BTW, this is the hose that’s failed: 59-hoover-hose-overflow-501-onwards I’m having trouble getting one, and I’m especially having trouble getting the ring that fixes the hose on the inside of the plastic drum. As you can see, they do refer to it as an overflow hose. Any further thoughts now you know what it looks like? Thanks so much again for you input … I have no idea how you have the time to respond to the many posts on your site. It’s impressive. Cheers,
0 replies I don't think that's an overflow hose Jeremy - unless it attaches to a place where it could be safely pumped away down the drain. If it leads to open air, and therefore any water running up it would end up on the floor it must be an air vent.. Anyway, I think it would be hard to fill the hole in a way that would be watertight because the water in the drum gets thrown about a lot during spin and there's a lot of force of water thrown at it. Water is notoriously hard to contain. You'd need to have something larger than the hole and seal it solidly in place with a strong sealant such as one I used to use all the time called Debor washing machine sealant (as used by engineers).
I don’t think that’s an overflow hose Jeremy – unless it attaches to a place where it could be safely pumped away down the drain. If it leads to open air, and therefore any water running up it would end up on the floor it must be an air vent..
Anyway, I think it would be hard to fill the hole in a way that would be watertight because the water in the drum gets thrown about a lot during spin and there’s a lot of force of water thrown at it. Water is notoriously hard to contain. You’d need to have something larger than the hole and seal it solidly in place with a strong sealant such as one I used to use all the time called Debor washing machine sealant (as used by engineers).
0 replies Hello, I have a problem which sort of fits in with the above, with a bit of a big difference. I found this site as I was trying to work out how I could fix a hole in an outer plastic drum that I'm about to *create*! I have a Hoover Elite 920, circa 1985. It has an overflow hose that attaches to the outer plastic drum about half way up (i.e. half way up the drum) and then goes vertical and attaches to the overflow port in the rear panel of the machine, about 10 inches up from where it exits the drum. And there's the first question ... why the heck did they attach it to the drum way down there, instead of *above* the maximum fill line, where I'd expect an overflow hose to be placed? Anyway, that's where it is. The overflow hose has cracked due to hardening of the rubber and the constant movement of the drum over thirty years' of use. Water floods out of the machine at anything above minimum fill level at about the same rate at which it's going in. I can't get a new hose; specifically, I can't get a new clip that attaches the hose to the inside surface of the outer plastic drum. I'm happy to live without overflow protection, so my plan is to remove the hose completely and seal the (approximately 2-inch diameter) hole it will leave behind. So I'm just wondering if anyone has ever done this and if so, what method did you use? I guess my thoughts are to cut a 2-inch diameter disc of plastic (although what plastic to use is the first question) and then glue / weld / somehow just attach ... it to the outside of the drum. Many thanks for any suggestions or comments you might have.
Hello, I have a problem which sort of fits in with the above, with a bit of a big difference. I found this site as I was trying to work out how I could fix a hole in an outer plastic drum that I’m about to *create*! I have a Hoover Elite 920, circa 1985. It has an overflow hose that attaches to the outer plastic drum about half way up (i.e. half way up the drum) and then goes vertical and attaches to the overflow port in the rear panel of the machine, about 10 inches up from where it exits the drum. And there’s the first question … why the heck did they attach it to the drum way down there, instead of *above* the maximum fill line, where I’d expect an overflow hose to be placed? Anyway, that’s where it is.
The overflow hose has cracked due to hardening of the rubber and the constant movement of the drum over thirty years’ of use. Water floods out of the machine at anything above minimum fill level at about the same rate at which it’s going in. I can’t get a new hose; specifically, I can’t get a new clip that attaches the hose to the inside surface of the outer plastic drum. I’m happy to live without overflow protection, so my plan is to remove the hose completely and seal the (approximately 2-inch diameter) hole it will leave behind. So I’m just wondering if anyone has ever done this and if so, what method did you use? I guess my thoughts are to cut a 2-inch diameter disc of plastic (although what plastic to use is the first question) and then glue / weld / somehow just attach … it to the outside of the drum. Many thanks for any suggestions or comments you might have.
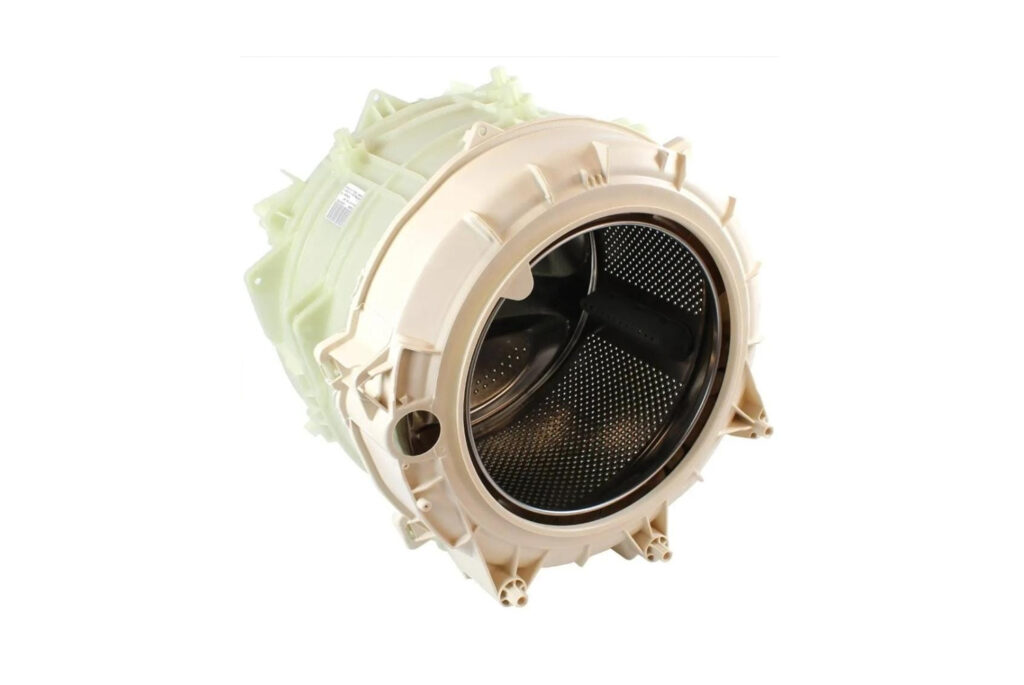
0 replies Update: I've received Richard's photo and updated this article to cover the subject. I've also added the photo to the article above.
Update: I’ve received Richard’s photo and updated this article to cover the subject. I’ve also added the photo to the article above.
0 replies Hi I have a Hotpoint washing machine WMT101 which has a plastic drum. It has been making too much noise on spin for a while now, and finally threw the belt off. The bearings are OK (my first thought was that they were on the way out). Hover, the motor is fixed by 2 screws on the rear of the machine into the tub and then a third spigot at the end of the motor nearest the front of the machine, fitting into what was a hole in a plastic bracket which is an integral part of the tub. The plastic bracket has broken which I believe has led to the motor banging on the tub, and eventually to it moving so much it has thrown the belt off. 2 questions 1. Is it possible to repair that bracket (I can supply a photo if necessary)? 2. Should there be some sort of rubber (or similar) sleeve between the metal spigot and the plastic drum to absorb shock? There is no sign of one, but the spigot seems too big for the hole otherwise? Any help will be much appreciated! I don't want to run the risk of any catastrophic failures (flooding!) as this is on a newly fitted wooden floor in a new kitchen!
Hi
I have a Hotpoint washing machine WMT101 which has a plastic drum. It has been making too much noise on spin for a while now, and finally threw the belt off. The bearings are OK (my first thought was that they were on the way out). Hover, the motor is fixed by 2 screws on the rear of the machine into the tub and then a third spigot at the end of the motor nearest the front of the machine, fitting into what was a hole in a plastic bracket which is an integral part of the tub. The plastic bracket has broken which I believe has led to the motor banging on the tub, and eventually to it moving so much it has thrown the belt off. 2 questions
1. Is it possible to repair that bracket (I can supply a photo if necessary)?
2. Should there be some sort of rubber (or similar) sleeve between the metal spigot and the plastic drum to absorb shock? There is no sign of one, but the spigot seems too big for the hole otherwise?
Any help will be much appreciated! I don’t want to run the risk of any catastrophic failures (flooding!) as this is on a newly fitted wooden floor in a new kitchen!
0 replies Many outer drums are now factory sealed and cannot be taken apart and put back together. It's a very bad step for repairability and longevity. I would think it highly risky to try and seal one yourself. If the seal failed you would have one hell of a flood. The seal would be subject to a lot of forces in spin.
Many outer drums are now factory sealed and cannot be taken apart and put back together. It’s a very bad step for repairability and longevity. I would think it highly risky to try and seal one yourself. If the seal failed you would have one hell of a flood. The seal would be subject to a lot of forces in spin.
0 replies My Maytag Maxima washer has the outer drum "glued" together rather than using the clips & gasket. Has anybody opened one of these and successfully put it back together either with silicone seal and screws or epoxy or an acrylate glue?
My Maytag Maxima washer has the outer drum “glued” together rather than using the clips & gasket. Has anybody opened one of these and successfully put it back together either with silicone seal and screws or epoxy or an acrylate glue?
0 replies Maytag outer drums are PP30%GF which is polypropolene with 30% glass fiber fill for strength.
Maytag outer drums are PP30%GF which is polypropolene with 30% glass fiber fill for strength.
0 replies I'm fairly sure it some sort of poly something. The exact type of plastic should be displayed on a logo/stamp on the actual tub itself. It could be anywhere on there but hopefully a determined person should be able to find it if they really need to know exactly.
I’m fairly sure it some sort of poly something. The exact type of plastic should be displayed on a logo/stamp on the actual tub itself. It could be anywhere on there but hopefully a determined person should be able to find it if they really need to know exactly.
0 replies What type of plastic is commonly used for the outer tub?
What type of plastic is commonly used for the outer tub?
0 replies Yes Steeve, it's only really appropriate for relatively minor repairs.
Yes Steeve, it’s only really appropriate for relatively minor repairs.
0 replies HI there, thanks for running this useful website. I have a front load stirling xqg65-908e about 4-5 yrs old, i just noticed a water leakage from the bottom of the unit. when i disassembled it, i noticed there are two symmetrical holes about 6 cm long and 5mm wide. i have read your previous post and i believed this could have happened by a coin trapped. I would really appreciate if i can send you some pictures and get some tips about the easiest to fix it ,for example if i can use sealant to fix the plastic outer tub.
HI there, thanks for running this useful website. I have a front load stirling xqg65-908e about 4-5 yrs old, i just noticed a water leakage from the bottom of the unit. when i disassembled it, i noticed there are two symmetrical holes about 6 cm long and 5mm wide. i have read your previous post and i believed this could have happened by a coin trapped. I would really appreciate if i can send you some pictures and get some tips about the easiest to fix it ,for example if i can use sealant to fix the plastic outer tub.
0 replies hi there, and thank you for the tremendously useful site! i have a hotpoint washer dryer aquarius, which had a hole punched in the outer drum. my husband repaired it (at my suggestion :-) ) using fibreglass and epoxy resin. it has worked well in that the leak went from about a bucket of water on the floor to just a few tablespoons. my question is this: if we don't mind this small amount of leakage, is it dangerous to keep running the machine, from the point of view of the electrics? if you were able to answer promptly that would be amazing as I ordered a new washing machine and now am feeling like i want to keep the old one, but i'd need to cancel the order today if i am going to! many thanks indeed
hi there, and thank you for the tremendously useful site! i have a hotpoint washer dryer aquarius, which had a hole punched in the outer drum. my husband repaired it (at my suggestion :-) ) using fibreglass and epoxy resin. it has worked well in that the leak went from about a bucket of water on the floor to just a few tablespoons. my question is this: if we don’t mind this small amount of leakage, is it dangerous to keep running the machine, from the point of view of the electrics? if you were able to answer promptly that would be amazing as I ordered a new washing machine and now am feeling like i want to keep the old one, but i’d need to cancel the order today if i am going to!
many thanks indeed
Nice one Jeremy. Good luck and keep us informed.
Likely replying to Andy Trigg (Whitegoodshelp)
Hi Andy, quick update. I have the new hose ready to be installed but I still haven’t managed to remove the inner perforated stainless drum … the spin bowl. I’ve removed its attachment device to the main gearbox shaft, but the thing simply won’t break free. I’ve tried shock, penetrating oil, heat (blowtorch), time, anger, swearing at it …
I need to remove it because when the hose goes through the main plastic water-containing tub, it’s clipped on the inside. The only way to get to this clip is by removing the spin bowl.
So this is what I’ve done. I cut the old hose off leaving about 1″ proud on the outside of the plastic tub. I found a circular piece of plastic, actually the top of an old bottle of bubble bath! … quite strong, won’t collapse under load … and I pushed it into the bit of old hose left sticking out of the plastic tub. Secured it tightly with a worm-drive pipe clamp. I ran the machine through a full cycle (remember the spin bowl is still unattached other than being rusted-on) on the assumption that one day, the spin bowl will break free. If and when that happens, I’ll fit the new hose, easy. But until that times happens, I have an as-new machine again!
I’ve done my first load of washing, without floods all over the laundry floor, in about 6 months! So now the Hoover Elite 920 is well into its fourth decade of continuous use.
Will update if and when the spin bowl finally gives up and breaks free and I get to finish the job.
Cheers,
Likely replying to Jeremy Bird
Hi Jeremy. I’ve never stripped down a top loading washing machine, only ever worked on front loading machines. However, to take the inner drum out the drum pulley is usually a left hand thread, and you need a heavy mallet with plastic ends to knock it out. But on such an old machine if you force out the drum you are likely to find the seals all rotted and worn inside and disturbing them will likely result in leaks and collapsed bearings if reassembled without replacing the seals.