Yes, it’s sometimes possible to do an effective repair on a washing machine drum, and this article tells you how. It describes 3 different methods of sealing a cracked drum. Virtually all washing machine outer drums (or tubs as they used to be called) are now made out of plastic. Now they can no longer rust, which is great, but there is a big disadvantage. Coins, or other metal obstructions, can now all too easily crack or put a hole in a drum, causing it to leak – or even flood.
Before fixing the damaged drum
Coins are a common cause of cracks in the drum, but anything metal can cause damage. If you find just a thin crack, then it was probably caused by the impact of an object. This object will still be inside the washing machine somewhere. But if there’s a large hole in the drum, the object may have been punched right through.
See if you can find it on the floor, or in the base of the washing machine. If this object remains inside the machine, it can cause more damage, so you need to find it before any repair.
Also, carefully examine the inner drum for dents, which are evidence of an obstruction. Check inside the sump hose and pump filter. Also lean the machine over from side to side and front to back to see if anything slides around in the drum.
Holes in the drum can be impossible to fix (although I do mention something to try later). If you just end up with a small crack, you can sometimes carry out a successful repair.
You must find the cause of the damage
If there is something inside the drum, you can usually hear it slide about. This article might help if there is something inside that you can’t get at – How to remove something stuck in washing machine drum.
How to repair a crack in the drum
In the case of a thin crack in a drum that’s leaking water, I’ve successfully repaired many of them with a soldering iron.
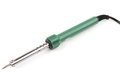
This method has worked for me. You have to be careful not to put too much pressure on, though. The point on a standard soldering iron is pretty small. So if you aren’t careful, you can potentially go through a drum with a hot soldering iron, like a knife through butter.
Get the soldering iron nice and hot. Then gently go over the crack to melt the surrounding plastic and seal it up. I try to bring some of the plastic from each side of the crack over to melt into the crack. It may be necessary to unplug the iron if you can’t get close enough. In which case you may need to keep plugging it back in to keep it hot enough as you go along.
Ideally, the crack should be sealed from inside and out. But these days that’s often impractical because many drums are welded together. Many can’t be stripped down now, by design. If by any chance you have stripped one down to investigate the leak before discovering the crack, then that’s an opportunity to seal it on the inside too.
Fix drum using washing machine sealant
After sealing up a crack using the soldering iron, I like to add a skin of sealant as a second defence. Washing machine engineers use a special flexible and heat-resistant sealant called Debor sealant. Rough up the surroundings with sandpaper and apply a large patch to cover the crack and surrounding area.
Use a special sealing tape
Alternatively, I’ve recently discovered special sealing tape that looks ideal for covering up a crack – as long as the crack is over a flat piece of the drum.
I recently used Gorilla tape to fix a leak on my roof gutter, which was advertised as weatherproof and waterproof. So I assume it would also be useful for this type of leak too. I would put plenty on and use lots of overlaps. Keep an eye on it though in case it starts to peel off.
Repairing a hole in the drum
If there is a hole in the drum, especially a large hole, or one that’s in an awkward spot, you may need a new outer drum – or replacement washing machine*.
If the hole is small, or in an accessible place, and especially if you have the piece of plastic that’s been punched out, you may be able to do a repair. If the plastic piece fits back OK and doesn’t push through into the drum, try sticking it in place with epoxy resin like Araldite.
Once stuck in place, you would need to seal the edges with the soldering iron as above. Then cover the whole repair with the tape I mention above. If you carry out a repair, but it fails, you could experience a disastrous flood. So don’t attempt any drum repair unless you are confident it will never leak again.
Don’t forget that if you do not identify what caused the damage and remove the obstruction from inside the washing machine it could do it again.
*Can you claim on home insurance?
If you have accidental damage cover on your home contents insurance, then you may be covered if something gets inside the washing machine and causes fatal damage. Let me know if you are successful.
Related
Motor bracket fixing broken on outer drum
Repairs
Fixed-price repairs, Pay monthly options, Repair & protect your whole appliance..
Save Money Now
Subscribe to Which? today and start saving money now. Subscription offers often available.
Spares
Spares4Appliances is a spares company run by repair engineers who understand all about spare parts for appliances.
Hello Richard, just send me a message using my contact form and I’ll email you back and you can attach the photos to a reply.
Update: I’ve received Richard’s photo and updated this article to cover the subject. I’ve also added the photo to the article above.
Hello, I have a problem which sort of fits in with the above, with a bit of a big difference. I found this site as I was trying to work out how I could fix a hole in an outer plastic drum that I’m about to *create*! I have a Hoover Elite 920, circa 1985. It has an overflow hose that attaches to the outer plastic drum about half way up (i.e. half way up the drum) and then goes vertical and attaches to the overflow port in the rear panel of the machine, about 10 inches up from where it exits the drum. And there’s the first question … why the heck did they attach it to the drum way down there, instead of *above* the maximum fill line, where I’d expect an overflow hose to be placed? Anyway, that’s where it is.
The overflow hose has cracked due to hardening of the rubber and the constant movement of the drum over thirty years’ of use. Water floods out of the machine at anything above minimum fill level at about the same rate at which it’s going in. I can’t get a new hose; specifically, I can’t get a new clip that attaches the hose to the inside surface of the outer plastic drum. I’m happy to live without overflow protection, so my plan is to remove the hose completely and seal the (approximately 2-inch diameter) hole it will leave behind. So I’m just wondering if anyone has ever done this and if so, what method did you use? I guess my thoughts are to cut a 2-inch diameter disc of plastic (although what plastic to use is the first question) and then glue / weld / somehow just attach … it to the outside of the drum. Many thanks for any suggestions or comments you might have.
I don’t think that’s an overflow hose Jeremy – unless it attaches to a place where it could be safely pumped away down the drain. If it leads to open air, and therefore any water running up it would end up on the floor it must be an air vent..
Anyway, I think it would be hard to fill the hole in a way that would be watertight because the water in the drum gets thrown about a lot during spin and there’s a lot of force of water thrown at it. Water is notoriously hard to contain. You’d need to have something larger than the hole and seal it solidly in place with a strong sealant such as one I used to use all the time called Debor washing machine sealant (as used by engineers).
Thanks for your reply Andy. I agree with you completely … this is a weird, large-diameter hose, that connects from half-way up the plastic drum to a white nylon rectangular port, maybe 6″ x 2″, which is fitted into a similar-sized slot in the galvanised back panel. When I first saw it I thought “What is that, some sort of overflow hose? But how can this be an overflow hose … it discharges straight out the back of the machine onto the floor, with no opportunity to attach a hose to it to run to a sink or drain?”. But I couldn’t think what else it would be. Your suggestion of it being a vent makes more sense given the design of the thing, but why would you need to vent from halfway up the plastic tub at a point which for all but the minimum fill level would be under water? And I agree with all you say about trying to seal the hole left by the hose if I simply remove it. Water is sneaky, inventive and incredibly determined to always find a way to head downwards at all costs! I think any patch I might apply wouldn’t last very long. I have thought about fixing a patch with glue/sealant like the one you suggested, and then wrapping some sort of strong fabric belt very tightly around the drum over the patch, and gluing that in a few places around its circumference to stop it sliding up or down. This is getting complicated. BTW, this is the hose that’s failed: 59-hoover-hose-overflow-501-onwards I’m having trouble getting one, and I’m especially having trouble getting the ring that fixes the hose on the inside of the plastic drum. As you can see, they do refer to it as an overflow hose. Any further thoughts now you know what it looks like? Thanks so much again for you input … I have no idea how you have the time to respond to the many posts on your site. It’s impressive. Cheers,
Hello again Andy, quick follow-up to my last. I’ve found a hose … it’s a miracle, a ‘new’ unused hose but obviously manufactured a long time ago, sitting way down the back of an appliance parts store! So now when I fit it, I know from the warning on that other site that I need to not only remove the rear gal. panel, but also remove the inner stainless steel perforated bowl assy so as to get access to where the hose is clipped on the *inside* of the plastic outer water-containment tub. As with all things for first-timers, it’s not obvious. So my question is, do you know where I might try for a service manual for the machine, a Hoover Elite 920 top loader? Manual download sites have probably taken over from lyrics sites as being fraught with danger … “here be dragons” … so I’m always wary. Thank you again.
Hello Jeremy. If this machine is over 30 years old I would seriously look into replacing it rather than stripping it down. Almost all of the parts are obsolete and if you have to strip it down and disturb main seals I wouldn’t hold out much hope of them remaining water tight. Over 30 years is ridiculously long for a washing machine, it would be more remarkable if it lasted too much longer even if you managed to fix it. The only manuals available are user manuals.
Thanks Andy. Can’t disagree with anything you say. Or, without the double negative, I agree with all you say! With that said though …. call me sentimental, but I just can’t bring myself to dump this thing for want of a hose! If only that damn hose wasn’t such a nightmare to replace. But now that I’m this far, I have to see it through. At the moment I’m at the stage of being unable to get the inner (perforated stainless) drum out, so the job is again on hold while I ponder. If a miracle happens and I actually get this thing working again and it heads towards its next milestone of forty years’ continuous use, I’ll report back. Your input and advice have been really appreciated, thank you.
Nice one Jeremy. Good luck and keep us informed.
Hi Andy, quick update. I have the new hose ready to be installed but I still haven’t managed to remove the inner perforated stainless drum … the spin bowl. I’ve removed its attachment device to the main gearbox shaft, but the thing simply won’t break free. I’ve tried shock, penetrating oil, heat (blowtorch), time, anger, swearing at it …
I need to remove it because when the hose goes through the main plastic water-containing tub, it’s clipped on the inside. The only way to get to this clip is by removing the spin bowl.
So this is what I’ve done. I cut the old hose off leaving about 1″ proud on the outside of the plastic tub. I found a circular piece of plastic, actually the top of an old bottle of bubble bath! … quite strong, won’t collapse under load … and I pushed it into the bit of old hose left sticking out of the plastic tub. Secured it tightly with a worm-drive pipe clamp. I ran the machine through a full cycle (remember the spin bowl is still unattached other than being rusted-on) on the assumption that one day, the spin bowl will break free. If and when that happens, I’ll fit the new hose, easy. But until that times happens, I have an as-new machine again!
I’ve done my first load of washing, without floods all over the laundry floor, in about 6 months! So now the Hoover Elite 920 is well into its fourth decade of continuous use.
Will update if and when the spin bowl finally gives up and breaks free and I get to finish the job.
Cheers,
Hi Jeremy. I’ve never stripped down a top loading washing machine, only ever worked on front loading machines. However, to take the inner drum out the drum pulley is usually a left hand thread, and you need a heavy mallet with plastic ends to knock it out. But on such an old machine if you force out the drum you are likely to find the seals all rotted and worn inside and disturbing them will likely result in leaks and collapsed bearings if reassembled without replacing the seals.