Yes, it’s sometimes possible to do an effective repair on a washing machine drum, and this article tells you how. It describes 3 different methods of sealing a cracked drum. Virtually all washing machine outer drums (or tubs as they used to be called) are now made out of plastic. Now they can no longer rust, which is great, but there is a big disadvantage. Coins, or other metal obstructions, can now all too easily crack or put a hole in a drum, causing it to leak – or even flood.
Before fixing the damaged drum
Coins are a common cause of cracks in the drum, but anything metal can cause damage. If you find just a thin crack, then it was probably caused by the impact of an object. This object will still be inside the washing machine somewhere. But if there’s a large hole in the drum, the object may have been punched right through.
See if you can find it on the floor, or in the base of the washing machine. If this object remains inside the machine, it can cause more damage, so you need to find it before any repair.
Also, carefully examine the inner drum for dents, which are evidence of an obstruction. Check inside the sump hose and pump filter. Also lean the machine over from side to side and front to back to see if anything slides around in the drum.
Holes in the drum can be impossible to fix (although I do mention something to try later). If you just end up with a small crack, you can sometimes carry out a successful repair.
You must find the cause of the damage
If there is something inside the drum, you can usually hear it slide about. This article might help if there is something inside that you can’t get at – How to remove something stuck in washing machine drum.
How to repair a crack in the drum
In the case of a thin crack in a drum that’s leaking water, I’ve successfully repaired many of them with a soldering iron.
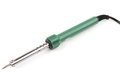
This method has worked for me. You have to be careful not to put too much pressure on, though. The point on a standard soldering iron is pretty small. So if you aren’t careful, you can potentially go through a drum with a hot soldering iron, like a knife through butter.
Get the soldering iron nice and hot. Then gently go over the crack to melt the surrounding plastic and seal it up. I try to bring some of the plastic from each side of the crack over to melt into the crack. It may be necessary to unplug the iron if you can’t get close enough. In which case you may need to keep plugging it back in to keep it hot enough as you go along.
Ideally, the crack should be sealed from inside and out. But these days that’s often impractical because many drums are welded together. Many can’t be stripped down now, by design. If by any chance you have stripped one down to investigate the leak before discovering the crack, then that’s an opportunity to seal it on the inside too.
Fix drum using washing machine sealant
After sealing up a crack using the soldering iron, I like to add a skin of sealant as a second defence. Washing machine engineers use a special flexible and heat-resistant sealant called Debor sealant. Rough up the surroundings with sandpaper and apply a large patch to cover the crack and surrounding area.
Use a special sealing tape
Alternatively, I’ve recently discovered special sealing tape that looks ideal for covering up a crack – as long as the crack is over a flat piece of the drum.
I recently used Gorilla tape to fix a leak on my roof gutter, which was advertised as weatherproof and waterproof. So I assume it would also be useful for this type of leak too. I would put plenty on and use lots of overlaps. Keep an eye on it though in case it starts to peel off.
Repairing a hole in the drum
If there is a hole in the drum, especially a large hole, or one that’s in an awkward spot, you may need a new outer drum – or replacement washing machine*.
If the hole is small, or in an accessible place, and especially if you have the piece of plastic that’s been punched out, you may be able to do a repair. If the plastic piece fits back OK and doesn’t push through into the drum, try sticking it in place with epoxy resin like Araldite.
Once stuck in place, you would need to seal the edges with the soldering iron as above. Then cover the whole repair with the tape I mention above. If you carry out a repair, but it fails, you could experience a disastrous flood. So don’t attempt any drum repair unless you are confident it will never leak again.
Don’t forget that if you do not identify what caused the damage and remove the obstruction from inside the washing machine it could do it again.
*Can you claim on home insurance?
If you have accidental damage cover on your home contents insurance, then you may be covered if something gets inside the washing machine and causes fatal damage. Let me know if you are successful.
Related
Motor bracket fixing broken on outer drum
Repairs
Fixed-price repairs, Pay monthly options, Repair & protect your whole appliance..
Save Money Now
Subscribe to Which? today and start saving money now. Subscription offers often available.
Spares
Spares4Appliances is a spares company run by repair engineers who understand all about spare parts for appliances.
Hello Andrea. I would think not. Do you have accidental damage cover on your house insurance by any chance? That may cover it.
They wouldn’t need to mention anything about how it’s made, and at the end of the day something left in pockets that damages the washing machine is always a customer’s fault – it’s an age old problem. When outer drums were made of metal it was much rarer for damage to occur though it still did in extreme cases. You could easily write off a brand new washing machine on the first day of use so always check pockets of everything before putting them in the washing machine. It should be the responsibility of everyone in the house to not leave anything inside pockets but ultimately the person putting them in the drum needs to double check. It’s very annoying.