Replacing a Washing Machine Water Inlet Valve
A washing machine inlet valve is a crucial component in the machine that controls the flow of water into the tub. Over time, the inlet valve may develop leaks, causing water to drip or gush from the machine, or it may simply stop functioning altogether. In such cases, you may need to remove and replace the inlet valve.
In this instructional article, we will guide you on how to remove and replace a washing machine inlet valve.
Before we begin…
- Disconnect the appliance from any power supply and isolate the supply so it cannot be accidentally reconnected while you are working on it.
- Wear gloves! While appliances are nice and smooth on the exterior and pose no risk to cuts etc, the inside of appliances can be extremely sharp as they are not designed for consumers hands to be inside the machine.
- If you are not confident in attempting any repair to a domestic appliance, then call an expert.
Materials needed:
- Replacement Washing Machine Water Inlet Valve
- Pliers
- Screwdriver (Phillips and flathead)
- Towels or a bucket to catch water
Instructions:
- Turn off the water supply – Before you begin working on the washing machine, make sure to turn off the water supply. Locate the shut-off valve on the wall behind the machine and turn it clockwise to shut off the water. If you cannot find the valve, you may need to turn off the main water supply to the house.
- Disconnect the hoses – Locate the hoses that connect the washing machine to the water supply. These are usually located on the back of the machine. Use pliers or a wrench to loosen the nuts that secure the hoses to the machine. Be prepared for some water to spill out once the hoses are removed.
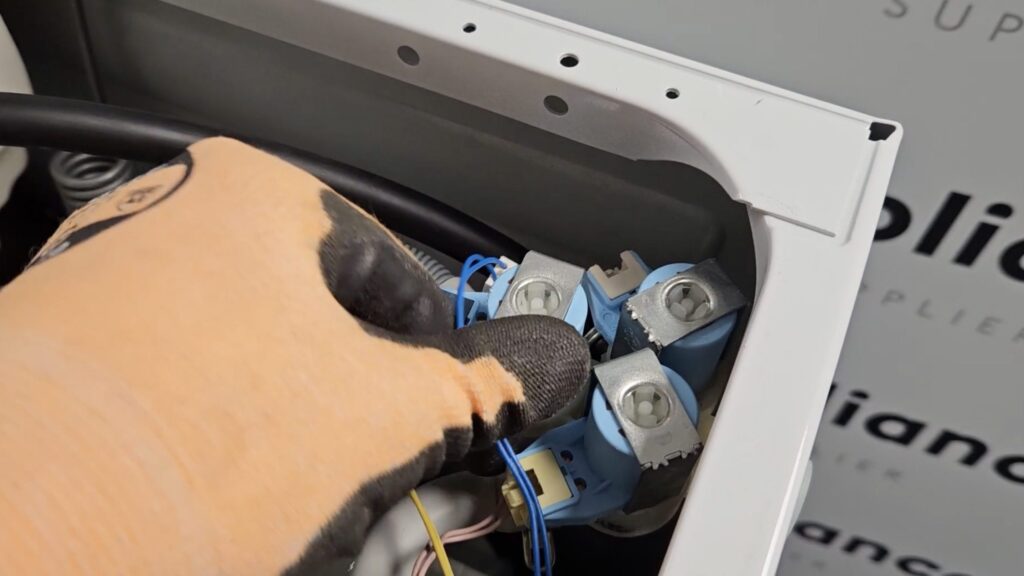
- Remove the valve – The inlet valve is usually located at the point where the hoses connect to the washing machine. Use a screwdriver to remove the screws that secure the valve to the machine. Gently pull the valve away from the machine to detach it from the hose connections.
- Replace the valve – Take the new inlet valve and connect it to the hose connections in the same way that the old one was connected. Make sure that the screws are tightened securely to prevent leaks.
- Reconnect the hoses – Attach the hoses to the new valve and tighten the nuts with pliers or a wrench. Be careful not to overtighten the nuts, as this could cause damage to the threads.
- Turn on the water supply – Turn on the water supply and check for leaks. If you notice any leaks, tighten the nuts further until the leaks stop.
- Test the machine – Once you have confirmed that there are no leaks, plug in the washing machine and turn it on. Check to make sure that the machine is filling with water properly and that there are no further leaks.
In conclusion, removing and replacing a washing machine inlet valve can be done with some basic tools and a little bit of patience. By following the steps outlined in this instructional article, you should be able to replace the valve and get your washing machine running smoothly once again.
Shop more Washing Machine Spares at Spare 4 Appliances today!