Replacing a Fridge Door Seal
Replacing a fridge door seal is a simple task that can improve the energy efficiency of your fridge and prevent your food from spoiling.
In this article, we will provide a step-by-step guide on how to remove and replace a fridge door seal.
Before we begin…
- Disconnect the appliance from any power supply and isolate the supply so it cannot be accidentally reconnected while you are working on it.
- Wear gloves! While appliances are nice and smooth on the exterior and pose no risk to cuts etc, the inside of appliances can be extremely sharp as they are not designed for consumers hands to be inside the machine.
- If you are not confident in attempting any repair to a domestic appliance, then call an expert.
Materials needed:
Instructions:
- Purchase a new fridge door seal – Before you begin, you will need to purchase a new fridge door seal that is compatible with your fridge model. You can find the model number of your fridge on the inside of the fridge door or in the owner’s manual.
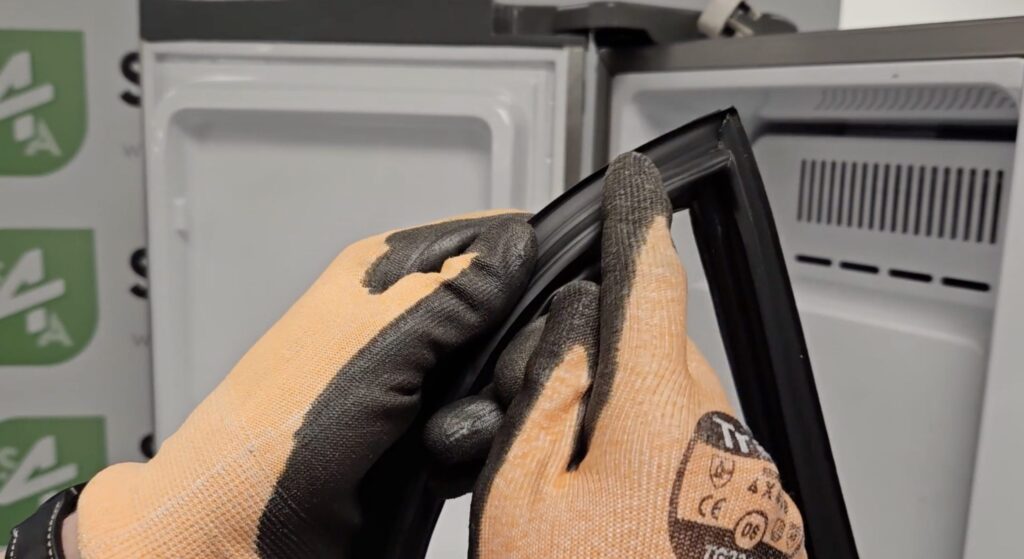
- Turn off the fridge and remove the old seal – To remove the old seal, turn off the fridge and unplug it from the electrical outlet. Use a flathead screwdriver to pry off the old seal from the door frame. Start at one corner and work your way around the entire seal. Be careful not to damage the door frame or the seal.
- Clean the door frame – Once you have removed the old seal, clean the door frame with warm water and soap or detergent. Use a towel to dry the door frame completely.
- Install the new seal – Start at the top of the door frame and insert the new seal into the groove. Work your way around the entire door frame, pressing the seal firmly into place. Trim any excess seal with scissors.
- Test the seal – Close the fridge door and check the seal. Make sure there are no gaps between the door and the fridge. If there are gaps, adjust the seal until it fits snugly against the door frame.
- Plug in the fridge and turn it on – Plug in the fridge and turn it on. Allow the fridge to run for several hours to ensure that the new seal is properly sealed and working efficiently.
In conclusion, replacing a fridge door seal is a simple task that can help improve the energy efficiency of your fridge and prevent your food from spoiling. With these simple steps, you can replace your fridge door seal and keep your fridge working at its best.
As well as Door Seals, we also stock a wide range of Fridge Freezer parts to help you keep your appliances running smoothly.