Replacing a Dishwasher Water Inlet Valve
If your dishwasher is having trouble filling up with water, it’s possible that the water inlet valve may need to be replaced. The water inlet valve is responsible for controlling the flow of water into the dishwasher, and if it’s malfunctioning, it can cause all sorts of issues.
Here’s a step-by-step guide on how to remove and replace a dishwasher water inlet valve.
Before we begin…
- Disconnect the appliance from any power supply and isolate the supply so it cannot be accidentally reconnected while you are working on it.
- Wear gloves! While appliances are nice and smooth on the exterior and pose no risk to cuts etc, the inside of appliances can be extremely sharp as they are not designed for consumers hands to be inside the machine.
- If you are not confident in attempting any repair to a domestic appliance, then call an expert.
Materials needed:
- Replacement Dishwasher Water Inlet Valve
- Screwdriver (either Phillips or Flathead, depending on the screws used to secure the motor)
- Pliers
- Wrench (if your dishwasher uses a bolt to secure the motor)
Instructions:
- Remove the Dishwasher’s Access Panel – To access the water inlet valve, you’ll need to remove the dishwasher’s access panel, which is usually located on the front of the unit. Use a screwdriver to remove the screws holding the panel in place, and then carefully remove the panel.
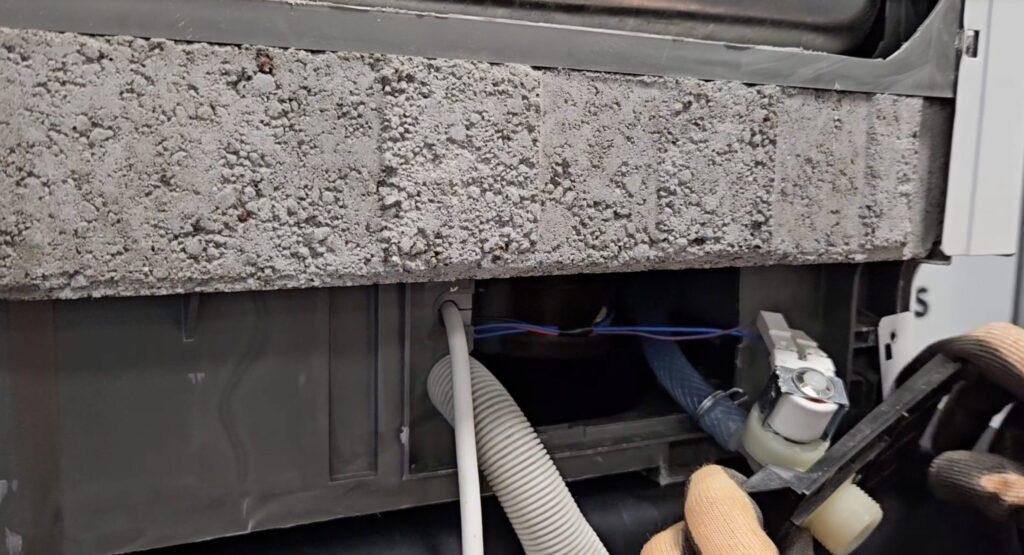
- Locate the Water Inlet Valve – Once the access panel is removed, you should be able to see the water inlet valve, which is typically located on the underside of the dishwasher’s tub. Look for the water supply line that connects to the valve, and then use a pair of pliers to loosen and disconnect it.
- Remove the Water Inlet Valve – Using a screwdriver, remove the screws that hold the water inlet valve in place. Once the screws are removed, you should be able to lift the valve out of the dishwasher.
- Install the New Water Inlet Valve – Take the new water inlet valve and position it in the same spot where the old one was removed. Secure the valve in place by tightening the screws using a screwdriver. Then, reconnect the water supply line by tightening the nut with pliers.
- Test the New Water Inlet Valve – After installing the new water inlet valve, it’s important to test it to ensure that it’s functioning properly. Turn on the water supply valve under the sink, and then turn on the dishwasher’s power. Start a cycle and observe if the water inlet valve is allowing water to flow into the dishwasher without any leaks or problems.
- Replace the Access Panel – Once you’ve confirmed that the new water inlet valve is working properly, reattach the dishwasher’s access panel using the screws you removed earlier. Make sure the panel is properly aligned and secure before turning the dishwasher back on.
In conclusion, replacing a dishwasher water inlet valve can seem like a daunting task, but with the right tools and a little patience, it’s a job that can be done easily. If you’re uncomfortable performing this task, it’s always best to seek the assistance of a professional.
Looking for more Dishwasher Spares? Then you’re in the right place! At Whitegoods Help, we stock popular parts for all dishwasher brands.